

Hi, this is Darius, and welcome to my Creativio AI 2.0 review.
When I first tried Creativio AI 2.0, I had one simple goal: make my product photos look clean enough to sell without spending hours editing.
I’ve done the whole “take photos, move lights, fix shadows, remove backgrounds, then still feel unhappy” thing. It eats time. And if you sell online, you need new images all the time.
After using Creativio AI 2.0, I can say this: it works really well for what it’s made for. It helped me take basic product shots and turn them into store-ready images that look sharp, bright, and more “pro.”
Yes, it’s still AI, so it can mess up sometimes. But overall, I got results fast, and I kept using it because it actually saved me time.
In this review, I’ll explain what it is, how it works, what features I used the most, where it shines, where it can slip, and who I think should get it.
What Creativio AI 2.0 Does Best
Creativio AI 2.0 is built for one job: make product images look better so you can sell more. It’s not trying to be a full design suite. It’s a focused tool for sellers and marketers who need clean product visuals for:
- Shopify product pages
- Amazon listings
- Etsy listings
- Ads for Facebook, TikTok, Instagram, and Google
- Social posts and promo graphics
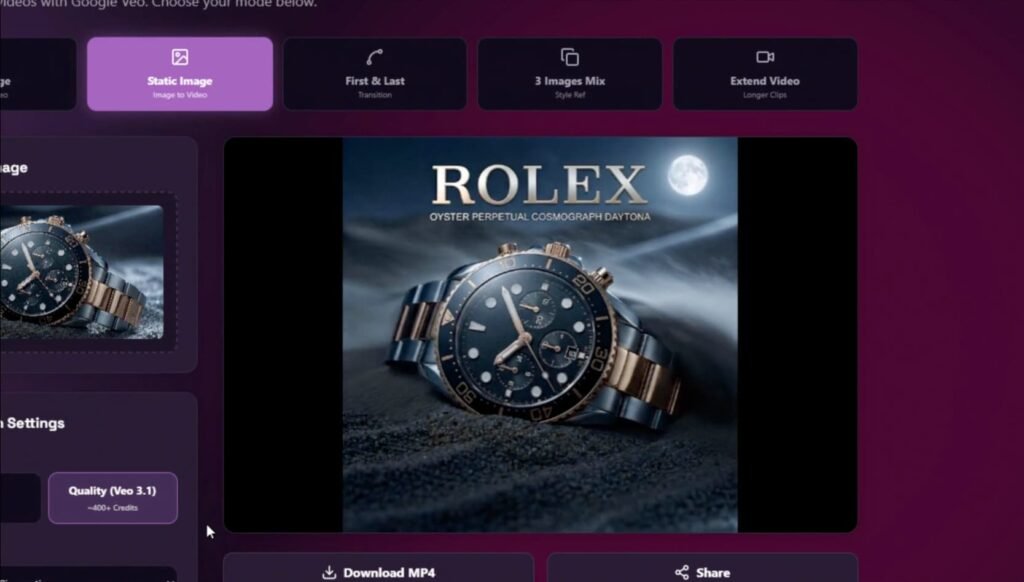
What impressed me is how fast I could get from “basic photo” to “use this on my store” in just a few minutes. Now, Creativio AI 2.0 is a web-based AI image tool. I upload a product photo, and it helps me:
- Remove the background
- Improve lighting and clarity
- Place my product into clean studio-style scenes
- Resize and export for different platforms
The key point is that I don’t need advanced editing skills. I’m not dealing with layers, masks, and complex tools. I’m making quick choices, previewing results, and exporting what I like.
If you sell physical products, it feels like a tool made for your daily workflow. When I’m testing a tool like this, I care about one thing right away: can I get a good result fast without fighting the interface?
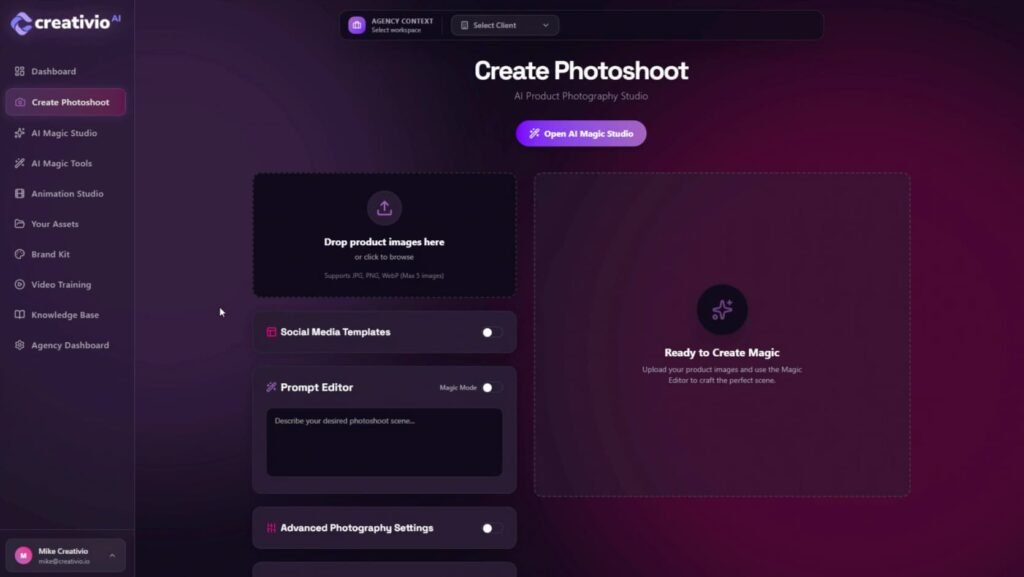
Creativio AI 2.0 felt simple. The steps are clear. Upload, pick an action, adjust, export. I didn’t have to guess what to do next.
Speed was one of the best parts. I could run several image changes quickly, compare versions, and keep the best one. That matters when you’re building a product page or making ad creatives and you don’t want to spend your whole day editing.
When Creativio AI 2.0 hits, the images look clean. The product looks sharper. The background looks more planned. The overall image feels more “store ready.”
But it’s still AI. Sometimes it makes weird choices, like:
- A strange shadow
- A background that looks too fake
- Small edge issues around the product
The good news is that I didn’t see that happen all the time. Most of the time, I got something usable, and often I got something I was happy to publish.
Creativio 2.0 Demo Video
Creativio AI 2.0 Pricing (Front End, Upgrades, and Bundle)
Creativio AI 2.0 Bundle – $397 (Best Deal)
If you want everything in one shot, the $397 Bundle stacks the Front End + all 3 upgrades in a single package. You also get all bonuses, plus tutorials and the knowledge base. No active coupon for the bundle.
Creativio AI 2.0 Front End – $37 to $47 (One-Time)
This is the main offer and it’s a one-time payment, no monthly fee.
It includes AI image generation (up to 5,000 images), background removals (up to 5,000), scene generation, 4K upscaling, object/text removal, brand kit + public feed library, 20+ styles, and premium support.
It also comes with a 14-day money-back guarantee and VIP training bonuses.
OTO 1: Creativio AI 2.0 Pro – $127 or $47/month
This is for heavy users who want unlimited generations and a more “pro” workflow. It also unlocks the full Studio Editor and faster processing, so it’s better for large catalogs or client work.
OTO 2: Creativio AI 2.0 Animation Studio – $147 or $67/month
This adds animation so you can turn static product images into motion visuals for ads, reels, and promos. It’s meant for people who want more scroll-stopping creatives without learning animation.
OTO 3: Creativio AI 2.0 Agency – $197
This license is for freelancers and agencies who want to sell Creativio-made visuals to clients and run unlimited client projects. You keep 100% of what you charge clients.
Vendor and Launch Dates for Creativio AI 2.0
Creativio AI 2.0 comes from Adrian Isfan, a verified seller on JVZoo. He’s also known for other software launches and he presents himself as a JVZoo top seller on his official profile pages.
If you like buying tools from vendors with a track record, his name will feel familiar.
The launch is set to start on January 30 at 11:00 AM EST. It runs until February 3 at midnight, then the price is set to go up (so the best time to grab the lowest price is during the launch window).
Creativio AI 2.0 Bonus Stack
Bonus #1: Unlock the $50–$150 Blueprint: Master AI-Driven Product Visuals
This training shows how to turn basic product shots into clean visuals you can sell for $50–$150 each. You also learn how to find store owners, pitch them, and close simple deals. Great if you want a quick “product visuals” service offer.
Bonus #2: AI-Generated Background Images (300 Pack + PLR)
You get 300 ready-made AI backgrounds in trending niches. Use them to make your product images look more “brand” in minutes. The PLR rights let you re-sell them under your own name too.
Bonus #3: Master Social Media Marketing in 10 Simple Steps
This gives you a simple plan to grow on social without guessing. It walks you through what to post and how to get more reach. Perfect to promote your product visuals and drive traffic.
Bonus #4: Unlock AI Profits
A practical guide to making money online with AI, with templates and checklists. It covers freelancing, content creation, and affiliate angles. Good if you want more ways to earn beyond product visuals.
Bonus #5: AI For Everyone (5 Simple Ways)
A quick guide to use AI to save time and cut busy work. It shows simple work uses like planning, writing, and research help. Nice if you want to move faster day to day.
Bonus #6: Dominate Social Media Marketing (51 Strategies)
This is a bigger playbook with lots of growth ideas. Use it when you want more tactics for traffic, leads, and sales. Great for scaling once you have a posting routine.
Bonus #7: The Profitable Mockup Bundle
You get mockups in 8 styles to present products and designs cleanly. This makes your images look more “store ready” and pro. Perfect for ads, listings, and client previews.
Bonus #8: Instagram Marketing Mastery
A focused guide on growing and selling on Instagram. It covers content, the algorithm basics, and turning followers into buyers. Best if your niche lives on IG.
Bonus #9: Effortless Efficiency With AI
A productivity guide that shows how to use AI tools to work faster. It covers planning, writing, meetings, and daily task help. Solid if you want to stay consistent without burning out.
Creativio AI 2.0 Review: Features I Actually Used and Why They Matter
This part is based on how I used it, not just feature names.
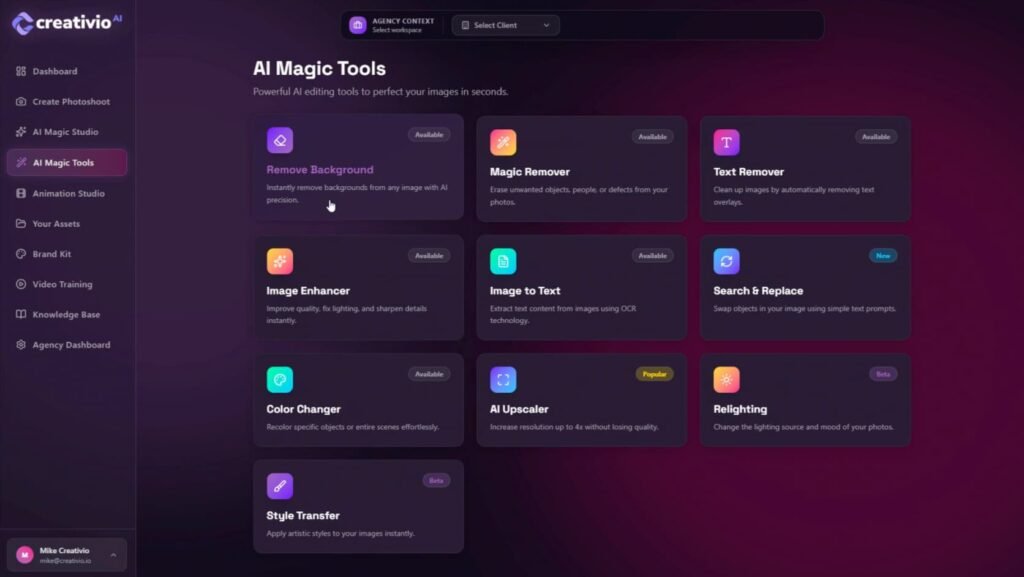
Background Remover That Saves Time
This was my most-used feature. Before Creativio, I’d either:
- Try to do it manually (slow), or
- Use another tool and still clean up edges
With Creativio AI 2.0, I removed backgrounds fast and got clean cutouts that I could drop on white, brand colors, or custom scenes.
Why this helps
- Cleaner product pages look more trusted
- Product photos look more “real” and less messy
- You can reuse cutouts for ads, bundles, and promos
AI Scenes That Make Ads Look Better
This was the “wow” part for me. I could take a plain product shot and put it into a cleaner setup. It instantly made my images look less like “I took this at home” and more like a brand photo.
I used this for:
- Lifestyle-style product images
- Ad images with clean backgrounds
- Social posts that needed more pop
Why this helps
Ads are visual first. People decide in one second if they stop or scroll. A better scene can lift clicks because the product looks more premium.

The AI mistake risk
This feature can make mistakes if you push it too hard. If you ask for complex scenes, AI can add weird props or make the product look off.
So I kept it simple:
- clean studio table
- soft light
- plain background
- minimal props
Simple prompts gave me the best results.
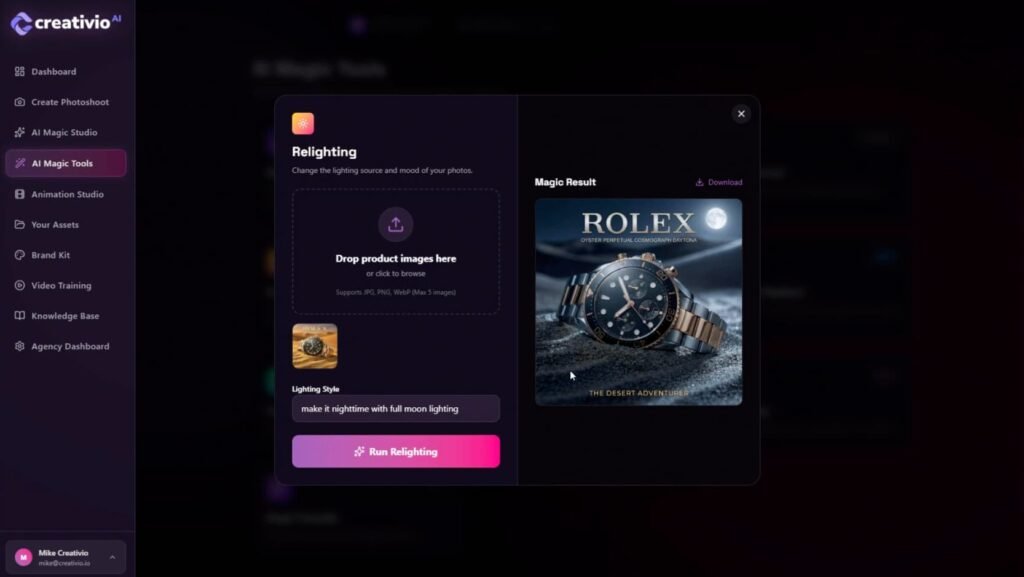
Lighting and Clarity Fixes
This feature made a bigger difference than I expected. Some of my original photos looked a bit dull. After running lighting and clarity improvements, the product looked brighter and more detailed.
Why this helps
- Better light makes products feel higher value
- Details are easier to see, so buyers trust more
- It helps keep your store photos consistent
I used it a lot on images that were “almost good” but needed a boost.
Upscale and Sharpen for Crisp Product Photos
This helped when I needed images that look clean on big screens and zoom views. A blurry image makes people doubt the product. Sharp images make the store look more legit.
I didn’t overdo it. Too much sharpen can look fake. But at a normal level, it made the product look clearer without weird edges.
Reframe and Resize for Different Platforms
This is one of those boring features that saves you hours. You need:
- Square images for feeds
- Tall images for stories
- Wide images for banners
- Clean sizes for product pages
Creativio AI 2.0 made it easier to get the same photo into multiple formats without rebuilding everything from scratch.
My Real Workflow Using Creativio AI 2.0
Here’s what I did to get consistent results:
Step 1: Take a decent product photo
I used a phone camera. I made sure the photo was:
- sharp
- bright
- shot near a window
- simple background
Step 2: Remove the background
This gave me a clean cutout I could reuse.
Step 3: Create 3 versions
I made:
- one clean white or clean brand color version
- one studio-style scene version
- one lifestyle-ish scene version
Step 4: Create promo tiles
I used simple text like:
- “New”
- “Limited stock”
- “Bundle deal”
Step 5: Export for store + ads
I saved the formats I needed for:
- product page
- meta ads
- stories
- TikTok style posts
That’s how I got a full creative pack from one photo session.
Creativio AI 2.0 vs Similar Tools I’ve Used
Creativio AI 2.0 vs Canva
Canva is great for design layouts and brand graphics, but it’s not focused on product photo upgrades. Creativio feels faster for product editing, then I can still use Canva if I want more design control.
Creativio AI 2.0 vs PhotoRoom
PhotoRoom is strong for fast cutouts and templates. Creativio feels more focused on the “studio look” and scene options. If you want more scene styles, Creativio can feel like the better pick.
Creativio AI 2.0 vs Photoshop
Photoshop gives total control, but it takes time and skill. Creativio gives speed. For most sellers, speed is the point.
Pros and Cons After Using Creativio AI 2.0
Pros
- I got store-ready images fast
- Background removal saved me time
- Scenes helped my ads look more premium
- Lighting and clarity fixes improved dull photos
- Easy to make many versions for testing ads
Cons
- AI can make mistakes, so you still need to review images
- Some scenes can look weird if you overdo prompts
- Fine details like glass and thin parts can be tricky
- Like most AI tools, results depend on input photo quality
What I’ve Seen From Other Users Online
From reading user comments and reviews online, the feedback tends to split like this:
Positive feedback themes
- People like the time savings
- Many like the clean look for product pages
- Some say support helped them solve issues quickly
Negative feedback themes
- Some users mention errors or tool downtime
- Some complain about plan confusion and upgrades
- A few say the output can be hit or miss on tough products
My take: that sounds normal for AI tools, but it also means you should test it on your exact product type right away.
Tips to Get the Best Results With Creativio AI 2.0
Use bright, sharp input photos
A good input photo gives better output. I got the best results when my photo was clean and well-lit.
Keep prompts short
When I kept scenes simple, the results looked more real.
Make a brand style set
Pick 2–3 looks and keep them. Your store will feel more pro when all product photos match.
Zoom in and check details
Always check:
- edges around the product
- label text
- shadow shape
- weird background artifacts
Create ad test packs
Instead of making one ad image, make 5–10 variants and test. Creativio makes this easier.
Creativio AI 2.0 FAQ
Is Creativio AI 2.0 easy to use?
Yes. I didn’t need design skills to get results.
Do I need a pro camera?
No. A phone camera works. Good light matters more than the camera.
Will it work for any product?
It works best for clear products with clean shapes. It can struggle more with glass, jewelry chains, or furry items, but it still can work with good photos.
Can I use the images for Shopify and Amazon?
Yes. Just follow platform image rules, like clean white background main images for Amazon.
Does it replace Canva or Photoshop?
It can replace a lot of basic editing. But if you want full design control, you may still use Canva or Photoshop for final layouts.
Final Verdict: Should You Get Creativio AI 2.0?
After using Creativio AI 2.0, I’d say it’s a strong tool if you sell products and you want better images fast. It helped me create clean product photos, make more ad variants, and improve the overall look of my store without spending hours editing.
Yes, it’s AI, so it can slip sometimes. But most of the time, it gave me a clean result, and when I kept my photos and prompts simple, it worked even better.
I recommend Creativio AI 2.0 for:
- Shopify and Etsy sellers who need better photos fast
- Amazon sellers who want clean listing images
- Small brands running lots of ads
- Freelancers making product creatives
I’d skip it if:
- You need perfect control for every pixel
- Your products are very complex and you want zero errors
- You hate testing and adjusting when AI makes a mistake
If you want speed, clean visuals, and more product image options without a studio setup, Creativio AI 2.0 is worth it.